Thursday, 26 February 2015

TAKE LIFE ONE CUP AT A TIME

I thought I would share a quick tutorial on how I decorated a laser cut tea pot and a matching coaster, and if you are interested both designs are available from THAT CRAFT PLACE, where I am a design team member.


TEAPOT:

As I have been getting messy with paint recently I thought I'd use paper for this project.  I chose a sheet from my collection of 12x12 and glued it to the tea pot leaving a small overlap which would be trimmed once the glue was dry.  I used PVA but you could use other glue of your choice.  I added a contrast paper for the lid and once the glue was dry I gently sanded the edges to remove excess paper and neaten the outline.  

I inked the edges and on this occasion I left the words untreated as I love natural wood and the colour matched the that ink I used.  To finish I sealed it with DecoArt Matt Medium, and attached the words to the teapot using fine fishing line and strong tape.  A strong glue could also be used to attach the fishing line if this is hung in heavy-used areas.


Finally I tied fishing line to the handle and the lid, so that it could be hung at an angle to give the effect of the teapot being poured.


COASTER:

I used a blank MDF coaster and coated it with paint, choosing (Guacamole)  PaperArtsy Fresco as this complimented the paper I was using. 


I also used a set of off-cut laser cut shapes to decorate the coaster.  I love thinking up different ways of using these and to add definition, so I glued a piece of matching paper with PVA and laid the wooden off-cut shapes onto it, smoothing out any air bubbles. 

 
Once the glue was dry I cut between the tiles with a sharp craft knife.


I trimmed and inked the edges of each tile, then moved them around on the coaster until I was happy with the position.  I then glued them on using Cosmic Shimmer as this is fast acting.  You could also use PVA, DecoArt medium or other glue of your choice.


To finish, I gave two coasts of DecoArt Matt Medium to seal.  I made this for decoration purposes and would add further coats of sealer if I wanted to use the coaster.


With a box of special tea bags (and a mug too if you are feeling generous!) this would make a nice handmade present Mother's Day.  
 
SUPPLIES USED:
Laser cut designs from THAT CRAFT PLACE - teapot, coaster, off-cut shapes.
Decorated papers to cover teapot and tiles
Glue - PVA or other suitable for attaching papers.
(Please note: you could use the same glue for attaching the tiles, or use Cosmic Shimmer.  There is no right or wrong, just preference and what you have available).
DecoArt Matt Medium to seal (you could also use this to glue if liked)
Ink for edging
PaperArtsy Fresco paint.
Fishing line available from angling shops
 
Thank you for popping by!!

Friday, 20 February 2015

A YEAR IN PHOTOS, 2015 - WEEK 7

This is my 5th year of Project 365 and rather than have my photos sit on my computer I have decided to share them here weekly.
Welcome to week 7:
 

Day 43. A frosty but bright sunny day for my morning walk.


Day 44. A craft retreat and a lovely Valentine's gift bag from a thoughtful friend. The start of a fantastic weekend!

Day 45. One of projects I completed.  I had made this journal a long time ago and I never liked the cover. A coat of gesso, a few layers, and it was transformed.  Now I have decided to keep it as I love the result so much!! 


Day 46. My creative corner.

Day 47. New paint! I am enjoying lots of mixed media at the moment.

Day 48. I was invited to look round a local building that is undergoing major redevelopment. I have watched this work in progress with interest and was very excited to be shown inside. This wonderful 16th building has had all the original beams exposed and it was discovered that some of the timber come from a barn or other building so are even older. If only walls and beams could talk! They might tell of when a war time explosive went off in a nearby field and caused damage to the roof. The replacement beams add to the history of this building and each peg, hole and joint are a secret code unless you understand.  

Day 49.  Pages prepared for painting and a fun day with friends. 


That's it for another week.  Thank you for popping by and I'll be back next week with more photos.

Friday, 13 February 2015

A YEAR IN PHOTOS, 2015 - WEEK 6

This is my 5th year of Project 365 and rather than have my photos sit on my computer I have decided to share them here weekly.
Welcome to week 6:
 

Day 36. I am wondering whether to paint this unit or leave it wood.


Day 37.  Ingredients for making Gesso. The recipe worked really well and I have made a second pot since.


Day 38.  A day with friends at a local Crop. I didn't think to take a photo of us busy at work, but I did take a photo of this book made by a friend while I admired it!


Day 39.  The water isn't very clear at the moment and I love the reflection of the sky when it is.


Day 40. A play day. I cut a shape into plastic to use as a stencil.  If it works well I will make many more using other designs.


Day 41.  Another day experimenting, this time I printed onto wood and card using my Gelli Plate. I loved the effects it made.

 
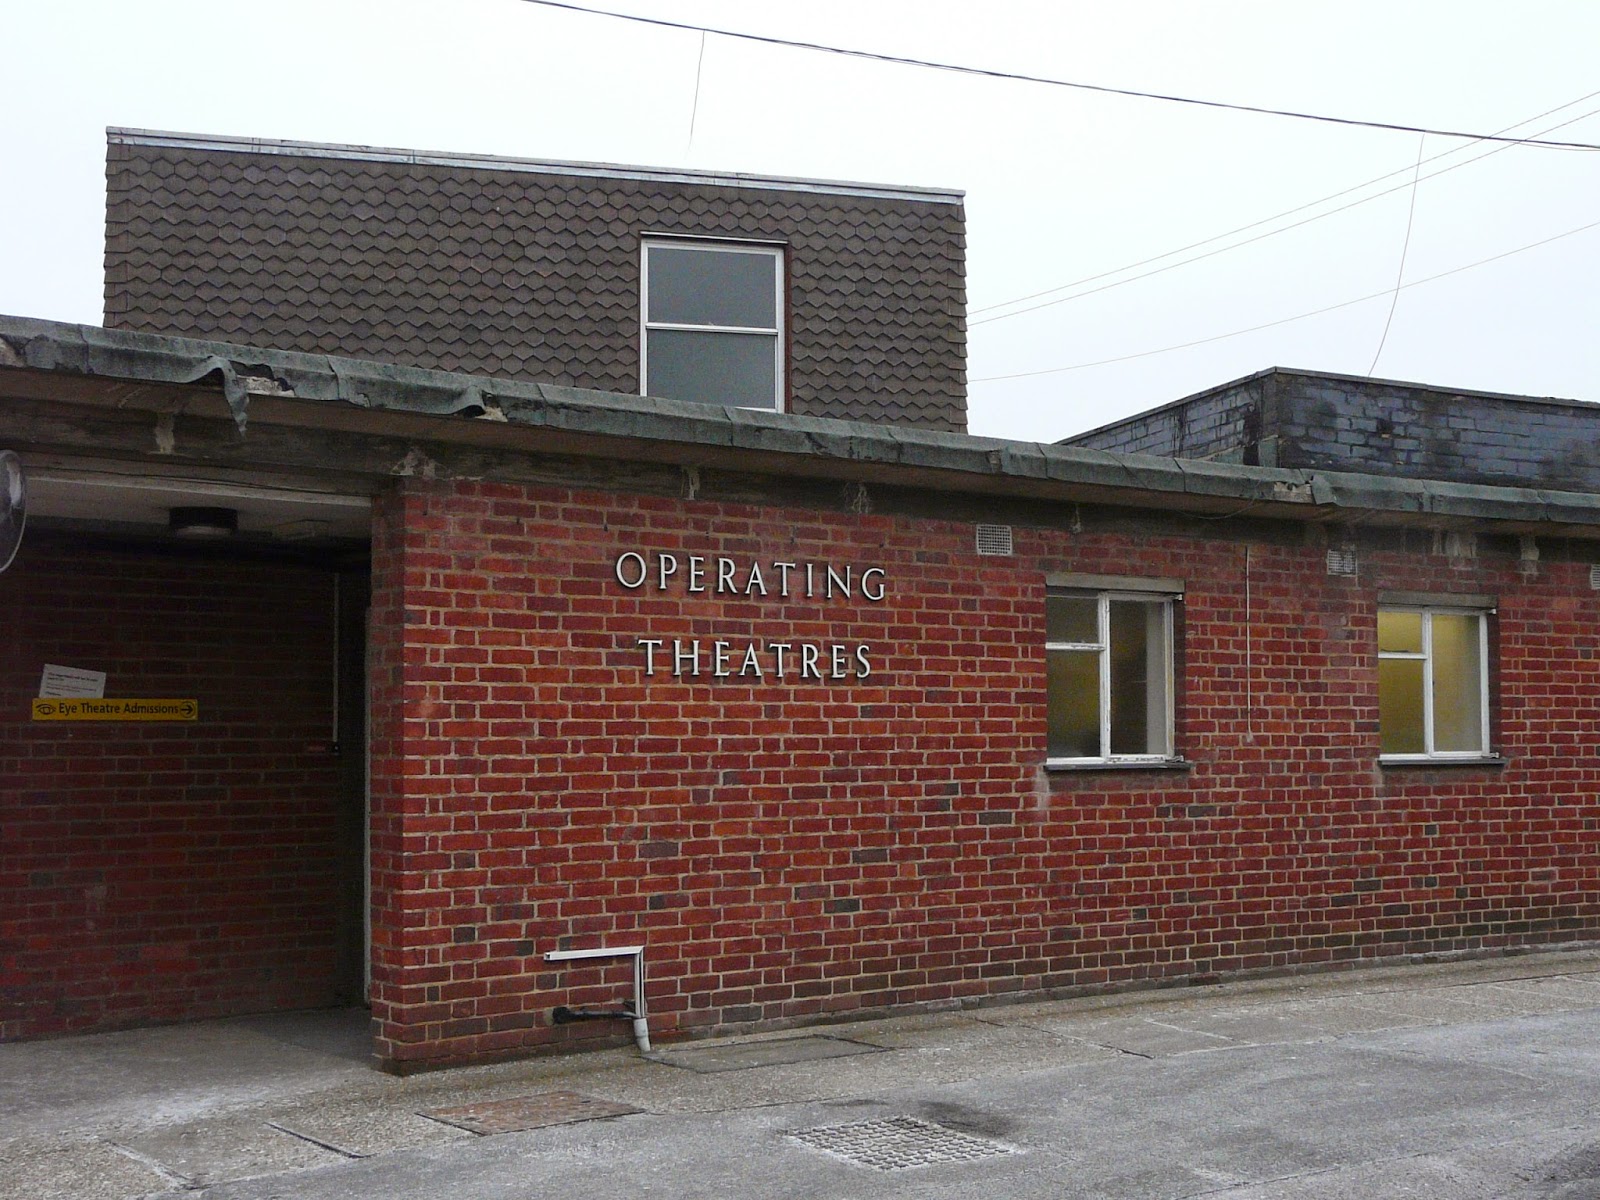
Day 42. Some of our local hospitals are high tech and well designed. Somehow this one has been overlooked.


Thank you for popping by and I hope your own week has been a good one.  I'll be back next week with more photos.

GELLI PLATE MEETS LASER CUT

I finally took my Gelli Plate out of it's packaging this week. You know how it is, you HAVE to have something and then it sits unused for months and months!  I have never used a Gelli Plate before but I was surprised at my immediate results. There were no rejects or practice pages as I was able to rescue any prints I didn't like by adding another print layer.  My pile soon grew and I plan to scan and print some of my favourites so that I can keep the original. That way I can reproduce a design when ever I choose.

For anyone who doesn't know what a Gelli Plate is, here is a link which also shows a demonstration.


Having gathered a lovely pile of prints my excitement grew. As a laser cut design team member for That Craft Place I had been looking for inspiration for two particular projects so the next day I
decided to take a risk and use my Gelli Plate. I had no preconceived ideas or plan, but just rolled on the paint and played. Here are the finished projects and in case you would like to try out any of these ideas, how I made them. 

PRODUCTS USED for both projects:
Laser Cut designs from That Craft Place
PaperArtys Fresco Chalk paints - Mermaid, South Pacific, Little Black Dress, Nouget, Guacamole
Gelli Plate and brayer
DecoArt Mat Medium
Sheet of card for the background
Flitter Glue and foam pad (to apply)
Craftynotions Guilding Flake - Copper Thunder
Chipboard letters - Funky Foam would also work (you could cut your own if you have a die/cutter)
Archival Black ink pad
PaperArtsy stamps
Stencil for Butterfly Frame (I used a sheet that is designed to cook ovenchips, it is sold in Poundland (UK) and it makes a great
grid effect).
TOP TIP - look around your home for interesting items that will make impressions in the paint. Just in case you are wondering I do have a separate sheet that I keep for cooking!


BUTTERFLY FRAME:


1.  I put small drops of paint onto the Gelli plate in a random pattern using 3 drops Nouget and 2 drops Little Black Dress. I used the brayer to spread the paint so that the colours blended but did not mix completely. I placed the grid stencil onto the plate, lifting, and repeating in a random fashion to leave impressions. I then laid the laser cut frame onto the Gelli Plate to make the first print. 
NOTE: If you have paint left on your Gelli Plate don't waste it. Use a piece of card or thick paper and build a collection of prints to use as background designs for other projects

2. Next I made the background to fit inside the frame.  I randomly put drops of Mermaid, South Pacific, and just a little Little Black Dress paint onto the Gelli Place and used the brayer to spread the colours without mixing them.  I then had the idea of using the clock face as a stencil as I love the large numbers and the butterflies. I
placed the clock face down onto the Gelli Plate then removed it.
This lifted the paint leaving an impression. I  placed a sheet of white card onto the Gelli Plate and gently rubbed the back to get an even print. When I lifted the card the clock face showed as white.

3.  I put a mix of Guacamole and Mermaid paint onto the Gelli Plate and used the brayer to spread. I laid the row of butterflies onto the paint to give colour.  I also added a hint of this paint in a couple of areas of the frame.  Using Nouget paint, I stamped a small text onto the butterflies and then used Little Black Dress paint to
lightly edge the outline of the butterflies.

4.  I cut the background print so that it was slightly smaller than the frame. Then using PVA I glued it onto the back and smoothed it down. I then glued the frame into position. 
To finish,  I added a stamped quote in the corner and painted the letters with Little Black Dress. I applied a little FlitterGlue onto a foam pad and applied this to the grid stencil.  I stamped this onto each of the letters one at a time and added Guilding Flakes. I rubbed the excess flakes away using a small scouring pad or your
finger.  I glued the letters into position and then covered the finished project with Matt Medium. 

BUTTERFLY CLOCK:


1. I randomly put drops of Mermaid, South Pacific, and just a little Nouget paint onto the Gelli Place and used the brayer to blend the colours leaving slight variation. I placed the clock face down onto paint and repeated until the whole surface was covered.
2. I chose a small swirl stamp and applied FlitterGlue using a pad. I stamped this onto the butterflies one at a time, keeping within the outline, then added Guilding Flake. As before, I removed excess and gently buffed. 
3. To finish I stamped the seed head onto the centre of the clock face, and tips of the stamp onto the numbers to give more detail and continuity. Finally I covered the completed project with Matt Medium.  


PLEASE NOTE:
When using paint and FlitterGlue on your stamps wash immediately after each use so that it does not dry.  I use warm soapy water and an old toothbrush.

So, that's what I have been up to this week.  I have had great fun and my Gelli Plate will not be packed away as I know it will be in regular use from now on. If you have any questions or want more information about these projects or the Gelli Plate please let me know. Meanwhile, Lisa over at That Craft Place has an amazing collection of Laser Cut designs ranging from small packs of shapes to larger projects. The link again is here and I'll be back soon with more ideas and projects.

Thanks for popping by and your comments are always very welcome and appreciated.


Sunday, 8 February 2015

5 in 5 - MELANIE - Feb 2015


Melanie is my friend who lives in Australia and she loves photography. Every month Melanie has taken part in this monthly neme and we managed to find a way round her not having a blog by posting here. I love that we have found a way for her to take part so once again Melanie, over to you:
 
"Having left my garden unattended for 18 days while on a holiday to join the celebrations of my mother-in-laws 90th birthday I returned to find my one tromboncino zucchini (courgette) plant had gone berserk.  I picked ten huge specimens.  Since it was February 5th and I should be taking some 5 in 5 photos I decided these had to part of the 5 in 5 photos.  My head was still in a state of confusion as we had only returned home on February 3rd after a 20+ hour flight from the UK.  I knew my photos would have to be taken nearby so decided with the zucchinis now sitting on my kitchen bench I would start with them and walk into my garden which was a wilderness, for the rest of the photos.  So top RHS those zucchini with the electrical socket to give you an idea of their size.  Bottom RHS the plant which I picked the zucchini from. Top middle the couch grass which has completely over taken the artichoke section of my herb garden.  I need to do some serious weeding there but with temperatures in the thirties these past few days and the same expected for the next few days this will not happen immediately.  Bottom middle this is my leek patch which has come on great since I left.  Finally the photo on the LHS is some of the tomato plants which have also gone berserk.  We had few tomatoes before we left while away our friends looking after our home said they have been giving tomatoes away and there are still heaps to come".


Unfortunately I didn't get to see Melanie on this brief visit to the UK but there are plans for her to return this summer so hopefully we will catch up then.  As always, a big thank you to Melanie for sending these photos, especially so soon after her long flight home. If this has inspired you to pick up your camera and take part in this challenge you have until 25th before this months link closes.
 It's great fun and this post should answer any questions or give other information that you need.


Links for this months post are here and hopefully I'll be back with more photos from Melanie and myself next month. I hope you will join us and thanks for popping by!

Friday, 6 February 2015

A YEAR IN PHOTOS, 2015 - WEEK 5

This is my 5th year of Project 365 and rather than have my photos sit on my computer I have decided to share them here weekly.
Welcome to week 5:
 
Day 29. A day with my daughter pattern making. Our next step is to cut the fabric....


Day 30. Colchester Castle.  Some of my books are part of a local art exhibition so I came today to drop them off.


Day 31. A visit to our local farmers market.
I discovered a smokery has opened a couple of miles from my home.
How did I not know about that?! I bought some lovely smoked garlic and salt and plan to visit soon for some cheese and salmon. 
I came home with laden bags of locally free range ham and bacon and a visit is planned there too as I want pork to make my own sausages.  


Day 32. My new bed time read. Some of the description is repetitive but the plot is interesting and I love the haiku that appears throughout.

 
Day 33. An interesting ice formation on a puddle, seen on my morning walk. 


Day 34.  I have been painting paper and getting very messy! I love the colours of these pages and the torn edges. I plan to make a book with them as part of an upcoming class.


Day 35.  I forgot to take photos during my class today as we were all so absorbed. I suppose that is a good thing, but a shame because there was some lovely books made. 
Instead here are some grapes left over from lunch. They are no substitute!


Thank you for popping by and I hope your own week has been a good one.  I'll be back next week with more photos.

Thursday, 5 February 2015

5 in 5 - February 2015 - FIVE THINGS IN FIVE MONTHS


Welcome to '5 in 5' where on the 5th of
each month I post 5 photos that I have
taken in 5 minutes. 


We have been decorating at home and catching up on some of the projects planned. There are still many more to do so I thought I would share five of them and set myself a goal of completing then in the next five months. That sounds reasonable and now I'm committed!  So here they are:
 

This set of photo frames still has the display images – it’s time I printed photos and put my own in!!

 
We redecorated the hall and painted the pine doors.  This has been a long time tussle for me as the doors had history and I love natural wood.  But they made the hall look dark and a bit drab, I guess I can always remove the paint in future if I want to go back!  
We decided to fit new door handles, putting my finger in the hole to close the door is not long term! 


I want to do something with this unit and I can’t decide whether to paint it or re-wax.  I love natural wood and most of our furniture has slowly been painted to make it brighter and more of the time. But I like the eclectic look so I want to retain some character and variety. Mmmmm... what to do?

The lamp stand was made by my great aunts husband. It is probably older than me and I love the shape and fact it is handmade.  It is another piece where I wonder what to do, leave it natural, or update?  Time will tell!!


These doors on our landing have yet to be painted. They have been a long time waiting.

 
Another photo project, and this one of my Mum with her first great grandchild is one of my favourites.  I printed it in sepia and think it would look better black and white. 
 
That just leaves me to plan these projects and get them done.  And if this has inspired you to do the same, or to get out your camera and to join in the '5 in 5' photo challenge it would be great to hear about it. I'll be back next month with more meanwhile, if you'd like to link in with your own photos here's the plan: 
 
  1.  Choose a location.

2.  Have your camera ready.

3.  Set a timer for 5 minutes (I use my mobile phone).

4.  Take as many photos you can until the time is up.

5.  Choose 5 photos to download and share by using the link tool below. 


     You have until the 25th of the month to add your photos.


There are more details here.


And one more thing - when you use the link tool, please click on your post title.  This will show the web address. Please right click, copy and paste this as your link.  This will take readers directly to your '5 in 5' blog page and be easier for them to find.


And don't forget, you have until 25th to post your link!

 Thank you for popping by, your comments are always welcome and appreciated. And thank you to those who join in, regularly or occasionally. I LOVE to see your photos and to see your own themes and ideas. Please keep them coming!!   


Related Posts Plugin for WordPress, Blogger...