Friday, 12 April 2013

MINI BOOK: Being Authentic

Last year I was invited to run a class at my monthly Eclectic Keepsakes crop.  Well of course, I immediately said yes!  I LOVE making mini books and felt honoured to be asked.

Then doubt set in! 

You see, I immediately thought of a beautiful little book I had once seen and thought 'one-day I will make that'.  Now, how many times do you do this?  Because I do it fairly regularly, and those ideas fade or get forgotten, or I can't find the original inspiration when I want it.  But on this occasion I DID find the picture I had printed. So it was meant to be!  Then I started to think of how I could make it my own.... 

And that's where the problem started....  You see, among the ladies who regularly attend the crop are those who create beautiful scrap book pages, members of design teams (some with published work), those who like layers and pretty pages, and others who use stamps and inking and make me want to hide my pads because their amazing techniques make me feel inadequate.... 

So how could I make this class appeal to everyone?! 

For the next couple of weeks I started to procrastinate, to search the internet and my books for alternative designs.  None clicked with me.  I still 'loved' my original idea.  So in the end I decided to STOP trying to compromise and think how I can please everyone else. I made up my mind to be me! 

To be authentic. 

This gave me new energy and focus so after making a sample I went shopping for materials.  What fun!  I had ideas in mind but in the shop I found some Simple Story papers. Now I love these, and while I shopped I mentally re-designed my pages so these could be 
included.  I enjoy being spontaneous and going with my intuition.  Sometimes I don't know what will turn out, but that makes it all the more exciting!

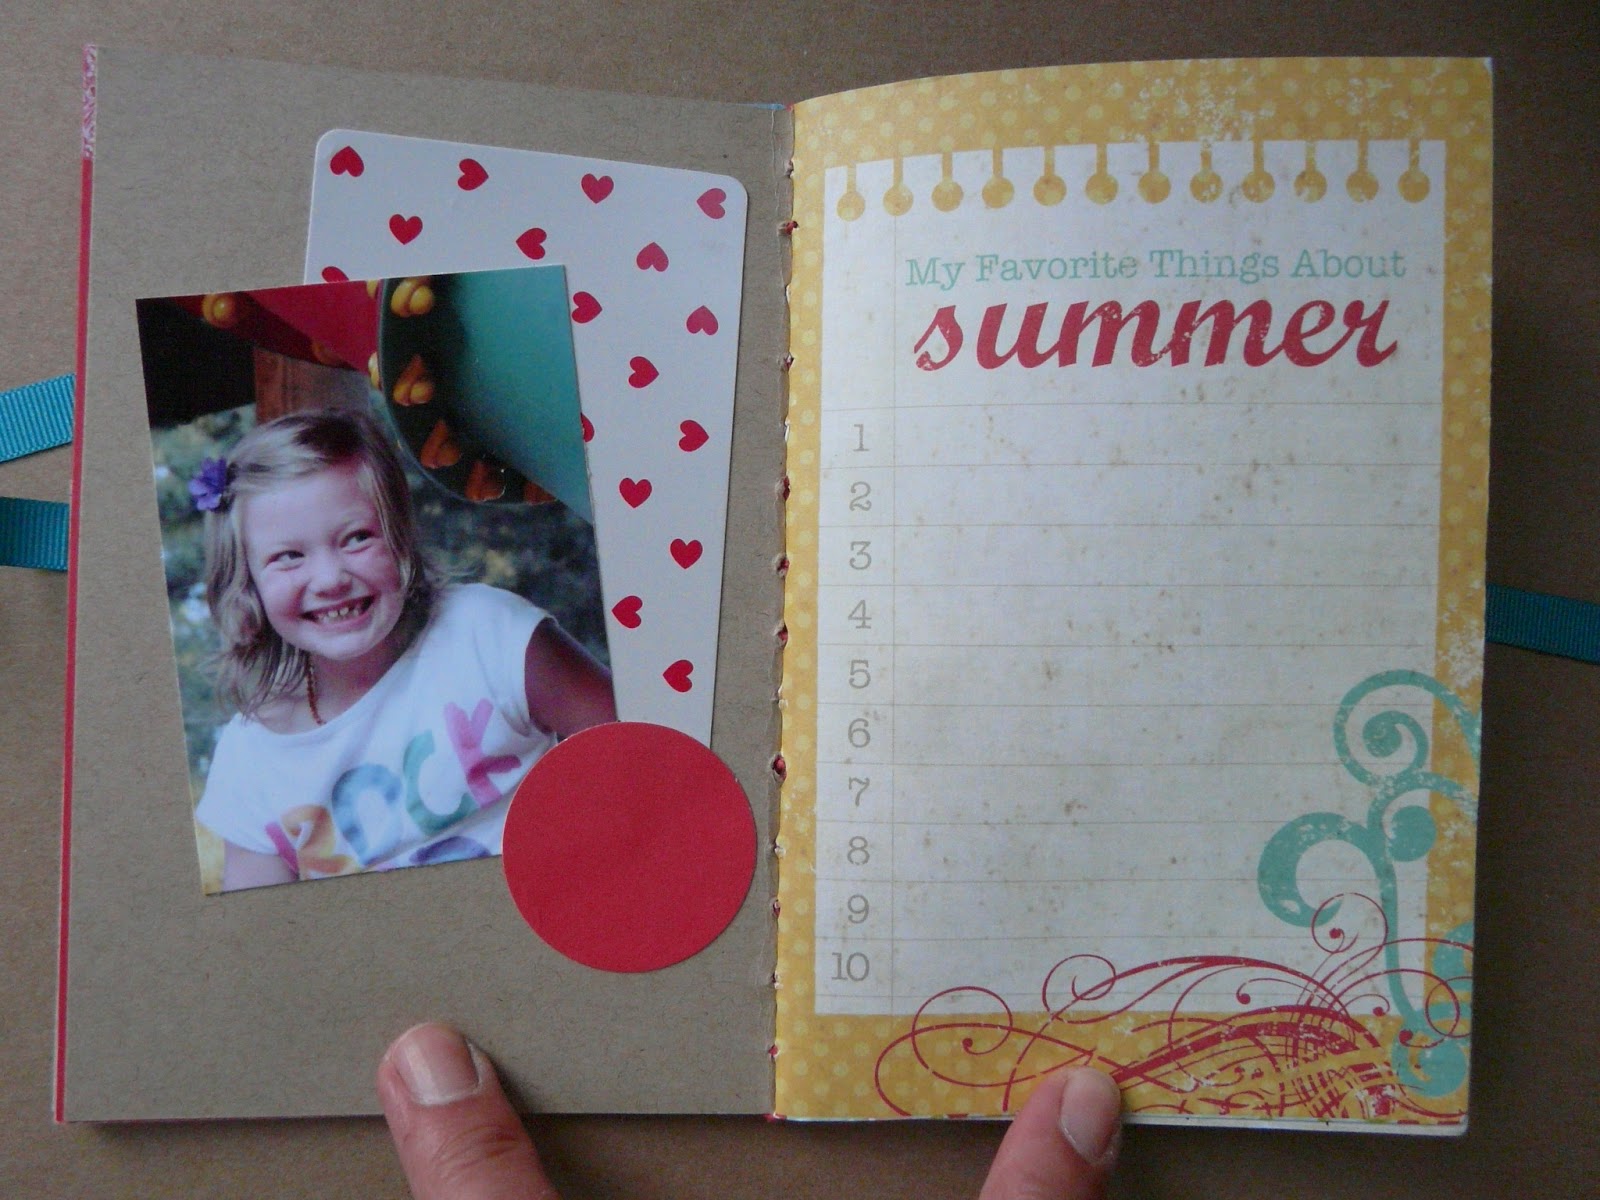
And armed with my new-found enthusiasm and materials I threw myself into making my Mini Book. I didn't even know the theme before I started, but the Simple Stories was perfect for a recent holiday and my book was quickly filled with photos and memories.  And I was confident that this was adaptable and that others could make it fit their photos and themes too.  At the crop I loved how other ladies used the same materials and design and made it their own, but sadly I have no photos of these to share. 

But I do have photos of my book. It is also a reminder to me to be authentic at all times. And rather than be photo heavy I thought I'd make a short video. But do you know what?  I have sat here hours today trying to do this, so for now I will add some photos and maybe try and do a video later.  And I'd be interested to know what you prefer?  Photos or video?


Some of the smaller photos serve as pages within pages. That makes it ideal for journaling or adding even more photos on the back if like me you struggle to know what to leave out!


There was lots of space for journaling.


Some of the pages above were unfinished and I have now added journaling or final finishes. And I am glad I stuck to my original idea for the design. 

And if you run classes I wonder if you can relate to my dilemma?  How do you go about trying to make the experience enjoyable and meaningful for everyone?   

Wednesday, 3 April 2013

BOOK MAKING COURSE

The bookmaking course I recently attended was described as ‘Bookbinding for the Curious’ so I had envisaged making signatures and learning new techniques.  My excitement was bubbling!

The course was run by a group of ladies who are highly talented and I had been in awe of their handmade books that I had seen at their Book Fair.  However, this workshop turned out to be basic, and we made two folded ‘books’ and two with simple stitched pages.  I had made all these designs before; but rather than feed my disappointment I made up my mind to enjoy the company and the day. 
Here are a few photos. I have tried to show construction and if anyone would like more information please do let me know.


This A3 sheet was cut and folded to create an instruction book.


Another set of folds.  The coloured sheet formed a cover by
tucking in the end pages of the insert into the fold.


 A simple book with cover.  Pages were landscape A5 folded,
and sewn in to place using a three hole stitch.


 Taking it another stage further, the red book cover was made out of a long strip of card with a bottom fold to make a pocket.  The size does not need to be exact - you can use scraps or what ever length you have. But for those who like to have a guide ours was cut from an A3 sheet of card so our strips measured 16.25 inches long x 5.25 inches wide. 
We folded 1.25 inches across the length to form a pocket, and then pockets together, folded the strip in half. Each half was then folded back into the centre fold, making a W shape (see  pictures below). 


The finished book is 4 inches square.  You could cut your card this high and omit the flap if you wish.  I am giving the full instructions as this gave the book an extra dimension. 
 
Next add pages. 
These are three mini books using 4 white pages (folded) and a cover to give added interest.  They should measure same height as the finished book (4 inches in this example) and mine are 3 inches wide finished size.  Each is sewn into a fold of the cover using a simple 3 hole stitch.
 
This is how you do it:
Mark a centre hole and another evenly spaced from the top and bottom.  You can use your eye, or if you prefer measurements mine are 3/4 inch.  Repeat so all books are the same.  Starting inside the page, push the needle through the centre hole and back through the top.  Take the needle right down to the bottom hole, through and back into the centre.  Tie the long loop into the knot as you tie the thread and cut leaving a tail.  You can see this detail on the blue book, and the red book for outside stitching.
 
Once your pages are attached it's time to make your covers. Cut 2  papers to decorate the front and back.  If you wish to add a tie glue this across the centre before you attach your cover.  I have done mine on the front.
NOTE!!  If you have folded pockets, check which way up your book goes before you do this!  If your book is like mine, you will cover the back and front pockets with your cover paper. I glued the pocket to the card before covering.  This leaves 2 neat pockets in middle of the book.
All the books were easy to make and the instructions for the red book over complicate what is actually a simple technique.  I am aware some people can work out designs by just looking, and other people like to have written instruction.  I hope I have managed to demonstrate both using the photos and detail.
 
 
I made a mental note in future to check out what courses involve and not to be misled by a title that excites me, but otherwise my initial disappointment did not last. I enjoyed the company and making the books that I shared here, and I was inspired to make more after seeing examples of what these talented group of ladies had made using the same techniques:


And of course, I was reminded why I was so excited to book this course in the first place. I hope they book more in the future!


Related Posts Plugin for WordPress, Blogger...